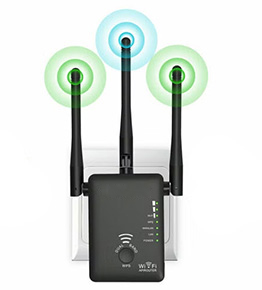
Wavlink AC750 Setup
This WiFi extender boosts the existing WiFi router signal. Wavlink AC750 setup removes all dead zones and reaches unreachable areas in your home. It works just like a wireless repeater. The steps below will guide you on how to do the Wavlink ac750 setup or the wifi.wavlink.com AC750 extender setup.
Configure Wavlink AC750 Extender
The Wavlink AC750 setup is so simple. With the help of these few tips, you will know very well about the setup of the extender.
Consider the display steps to configure their booster with the existing WiFi network. Follow all the steps in an arranged order.
Wavlink AC750 Setup Manual WPS Method
You can also do your Wavlink AC750 setup with the help of the WPS button. It is the fastest way to join the extender to the router or modem. You don’t have to enter details like a password in the configuration process.
When you press the WPS button, the Wavlink extender automatically gets the WiFi signal from the existing router. Now, let’s talk about the Wavlink AC750 setup. These are the few steps to the setup of the Wavlink AC750 extender.
Note: If you are facing any trouble during the Wavlink AC750 setup, then feel free to chat with our experts. We’re available 24*7 for your help.
Configure AC750 Using The Wavlink App
Wavlink AC750 users can also configure their wireless WiFi network using the mobile app. In fact, it is a recommended option by Wavlink. But, if you don’t know how to do the Wavlink AC750 setup using the mobile app, here are the steps you will need to follow:
This is a straightforward process. However, sometimes, users get stuck in the middle of the process. To avoid this type of issue, we would recommend you take our technical support assistance. Our Wavlink customer support experts will guide you to do the Wavlink AC750 setup in no time. You can reach out to us through the contact details provided at the top left of this page.
Common Wavlink AC750 Setup Errors
Irrespective of the Wavlink AC750 setup methods that we have shared above, you may face a variety of errors during the configuration. Some of the common Wavlink device setup errors include the following:
Apart from this, you may also experience some more identified or unidentified Wavlink AC750 setup issues. You can get rid of these stubborn errors with the solutions we have explained in the section below.
Solution of Wavlink AC750 Extender Setup Issue
Check All Wired Connection
After the Wavlink AC750 setup, if it does not work correctly, then first do not do anything, but check all cable connections. If you see any damaged wire, then immediately replace it with a new one.
Check the Placement of the Wavlink AC750 Extender
Most of the extenders do not work; the issue comes due to the placement of the extender. Make sure that you don’t place your Wavlink AC750 extender near the exterior wall, metal objects, microwaves, cordless phones, etc., because all these appliances absorb the WiFi signal from the router. The best placement of an extender is on the bookshelf or in the central location of the house or closest to the route,r not more than 10 to 15 feet
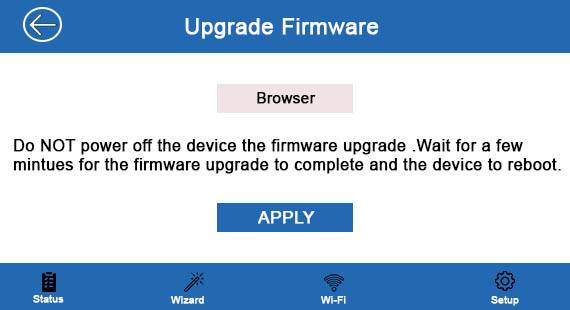
Wavlink AC750 Firmware Update
Outdated firmware of the extender causes the problem with the internet working issue. So we suggest you update the AC750 WiFi range extender firmware. If you don’t know how to update the firmware of an extender, then consider these steps.
Reset Wavlink AC750 WiFi Extender
After trying the above tips, if you are still facing an internet connection working issue, you can try resetting your Wavlink AC750 WiFi extender. Consider this process carefully.
Note: This is the method by which you can easily reset your Wavlink AC750 WiFi extender and fix issues with your internet connection.
Common Wavlink Extender Setups
Some Issues You Might Face
If you are facing any issues, please contact us, and we will be happy to help you.
