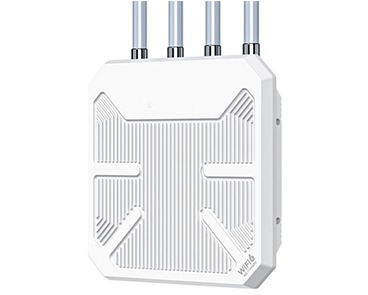
WL WN573HX3 AX3000 Extender Setup
Wifi extender is not a new term for people. For years, these devices have been helping internet users to provide seamless connectivity. In the areas where the routers alone are not able to perform well, the extenders help them provide the desired results. But you will get the complete results only if you configure these devices properly. Therefore, we have formulated this page that offers complete information about the Wavlink wn573hx3 ax3000 extender setup.
Top Features of Wavlink Wn573hx3 Ax3000 Extender
Well, there is no doubt that without extenders, routers’ performance can sometimes degrade or we can say that routers can’t fulfill the internet needs of users. Wifi extenders have transformed our wifi experience by providing super fast speed and seamless connectivity. Now, we can connect several devices to a single internet connection and there is no weak signal problem, all thanks to awesome extenders.
Wavlink is a renowned brand that offers wifi devices that are not only high-performing but also reliable. Here are the top features that make the Wavlink extenders everyone’s choice.
Speed
Wavlink extenders are known for their blazing-fast speed. As these extenders utilize advanced technology, they are capable of providing 3000mbps speed. Therefore, if you want to connect multiple devices and get a better experience for all, you can think of buying a Wavlink wn573hx3 ax3000 extender.
Dual-Band Connectivity
This extender supports dual-band connectivity, it operates on 2.4GHz and 5GHz frequency bands. It provides flexibility and improved performance so that you can choose any channel according to your internet needs. You can allocate devices to different bands based on their bandwidth needs for optimal efficiency.
Provide Extended Coverage
The antennas on this extender enable it to extend the wifi coverage at every corner of the house. Also with the help of these antennas, the extender efficiently eliminates dead zones and provides a strong and reliable internet connection throughout. Still planning to buy? Don’t think much, get it today and enjoy faster internet.
The list of features has not ended yet. The Wavlink wn573hx3 ax3000 extender has all the characteristics that people are looking to improve their wifi experience.
Preparations Before the Wavlink Wn573hx3 Ax3000 Extender Setup
There are a few preparations that you have to make before setting up the Wavlink wn573hx3 ax3000 extender. This will help you accomplish a hassle-free and smooth process. Read the below points carefully and do as required.
Time to Unbox the Extender
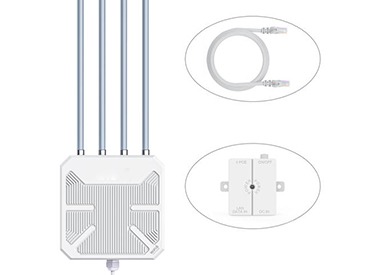
You will not find this point in the user manual or their website. But this step is essential for the successful Wavlink wn573hx3 ax3000 extender setup. Carefully unpack the extender and inspect all the components. The following things should be in the box:
Connect the Devices
The next step is to connect the extender to the power outlet using the power adapter. Then connect your device through which you will perform the setup with the network(SSID). Cross-check the connection between the router and the modem so that you will not face problems later.
Begin the Wavlink Wn573hx3 Ax3000 Extender Setup
There are various methods of setting up the Wavlink extender:
In this guide, we will discuss the Wavlink extender setup using a Web-based method. Take a look at the step-by-step instructions:
Reach out to us today and get back to enjoying seamless connectivity.