Wavlink WiFi 6 Extender Setup
Live Chat
Live Chat With Experts and Get Real-Time Responses.
Let’s Talk
Don’t Wait, Then You Can Call Us Right Away.
The WiFi 6 extender setup acts as a repeater that amplifies the existing router’s signals in a great way. In other words, it works to improve the current internet connection and clearly, there will be no need to change or purchase a new router. As the Wavlink WiFi 6 extender setup is compatible and can attach to every other brand of router.
It really does not matter, whether it is your abode or workplace, it will work in the same way. Through its easy WPS button configuration method, you can get this facility with less effort and time. To configure the device that comes under the WiFi 6 extender setup list or to get more knowledge about this device, keep reading this information.
WiFi 6 Extender Setup Specifications
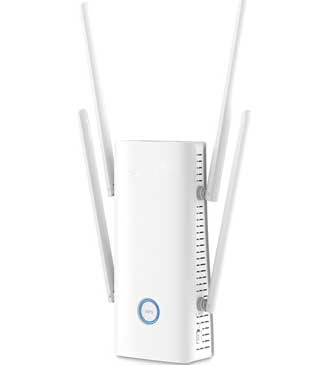
The WL WN583AX1 AX1800 extender that supports WiFi 6 extender setup works on the latest technology features. Which makes the signal amplifying process possible. Here are its new technical terms.
- It comes with the Next WiFi Generation, which supports 802.11ax WiFi 6.
- The WiFi 6 extender setup includes dual frequency bands which are 2.4GHz and 5GHz and offers an internet speed of up to 1800Mbps.
- For connectivity purposes, it has 2 Gigabit Ethernet ports.
- Also, WL WN583AX1 AX1800 can be configured through the WPS button.
- Moreover, it contains a built-in signal indicator for signal detection.
- Additionally, it performs on MU-MIMO and OFDMA technology that allows users to connect a number of devices to the network.
- Last but not least, the latest security encryption in the device, that is WPA-PSK and WPA2-PSK helps to make the network more secure.
WL WN583AX1 AX1800 WPS Configuration Process
Fortunately, the Wavlink AX1800 extender contains a WPS button that makes the configuration process simple. However, to use this method, your router must contain a WPS button no matter, the router is which brand.
- To begin with, join the antennas to the extender’s sides.
- Next, plug the extender into the active electrical power outlet.
- Ensure the router is within the range of the Wavlink WiFi 6 extender setup.
- Place the extender, router, and device in the same room for better connectivity.
- Following this, press the extender’s WPS button from its front panel.
- When the LED turns color, push the router’s WPS button immediately.
- Wait for some minutes till the extender and router connect successfully.
- As you are done with this procedure, connect your device to the wireless network.
- In order to do that, open the wireless network list on the device.
- Lastly, select the right network and insert the default password there.
As this approach doesn’t require the WiFi 6 extender setup’s login details, web, or IP address, that’s why it is the easiest installation method.
Wavlink WiFi 6 Extender Setup Pros
Undoubtedly, installing this device means getting a range of lucrative benefits along with maximal internet speed. Your devices will keep attached and get strong signals from the router without interruptions. Your house smart TVs, CCTV, desktops, and other devices will start working effectively. On the other hand, your workplace devices will perform well and there will be no hindrance in the workflow.
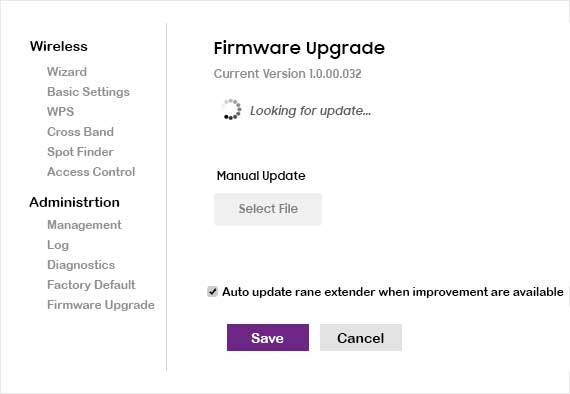
Update WiFi 6 Extender Setup Firmware
Undeniably, the smooth process of the extender requires the software to be updated on time. To keep the extender firmware latest, utilize these tips.
- In the first place, check the firmware on which the extender is currently working.
- Further, look for the latest firmware version of the extender on its official website.
- If there is any new version available, then download that file on your PC.
- Again, visit the web-based wavlink setup page of the extender and upload that file there on the Firmware Upgrade option.
- Thereafter, click the firmware update option and start the updating process.
- When the process will complete, the extender will require to reboot.
- In the end, restart the extender and connect the device with it and check its working now,
Troubleshoot The WiFi 6 Extender Setup Errors
If you get errors in the extender working, you may not be able to find the reason behind this, But, apply these resolving points to eliminate the errors.
- Discard the extender from the power sockets and check whether these sockets are working are not.
- Remove the router and disconnect the devices from the network too.
- Check the connection strength and the connected wires as well.
- Update the connected device’s web browser for better performance,
- Later, plug in the extender again and connect the device to it.
- Reset the extender if required, as it will discard the configured settings.
- In the end, do the extender configuration again and test if it’s working.
Therefore, by using this useful information, you will be successful in installing and using the Wavlink WiFi 6 extender setup. However, if you are not able to remove the errors, you can take help from our expert team. Simply ping us at 716-992-6371 or mail at [email protected].
Common Wavlink Extender Setups
Some Issues You Might Face
If you are facing any issues then please contact us, and we will be happy to help you.
Wavlink Customer Service
FAQs
The WL WN583AX1 AX1800 extender supports the WiFi 6 setup series that works on the latest technical terms. This Wavlink 6 extender setup series has some unique technical capabilities.
You can use the WPS configuration method to connect them both. Also, you can visit the extender’s web-based setup page to configure the Wavlink 6 extender setup.
Maybe the wireless security mode of the extender is not compatible with the device. So, disable that security option and try to connect again.