Wavlink Aerial HD4 Outdoor Extender Setup
Wavlink Aerial HD4 Outdoor WiFi range extender is among the latest additions in the Wavlink catalog. It is best known for its exceptional potential to deliver incredibly fast internet to a large outdoor area. If you brought this device home, you are certainly going to witness a significant improvement in your live streaming, online gaming, and video conferencing experience. But, to achieve this, you will first need to do the Wavlink Aerial HD4 Outdoor Extender Setup. It is a mandatory process as you can’t get going with your premium Wavlink device without completing this.
Wavlink Aerial HD4 Outdoor Extender Overview
Wavlink Aerial HD4 Outdoor Extender is an AC1200 dual-band wireless WiFi device, comes with an extensive variety of innovative features. As a user, when you buy this device, you receive almost everything that you expect. From the basic functions like setup, reset, and firmware update to some advanced features like PoE, the Wavlink Aerial HD4 Outdoor extender covers them all.
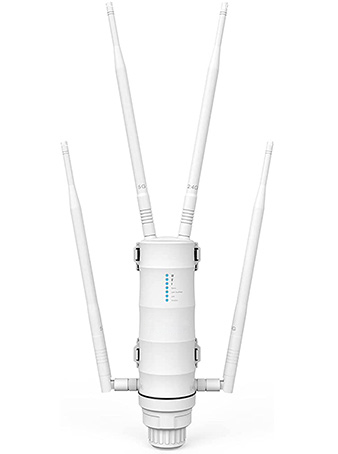
The device comes with an eye-catching design and is easy to carry as well. This makes it easier for users to deploy it anywhere outdoors. Coming to the external components and features of the device, you will find 4 detachable high-gain antennas, 1 LAN & 1 WAN port, 7 LED status indicators, and 1 reset button. Other features of the Wavlink Aerial HD4 Outdoor are dual bandwidth (2.4 GHz and 5 GHz), WPA-PSK/ WPA2-PSK encryption wireless security, weather-proof external body, and built-in high-power amplifiers. Apart from this, the manufacturer provides more than a couple of Wavlink Aerial HD4 Outdoor extender setup options that users can readily execute with the guidance of experts.
Deployment/ Installation Process of the Device
Since Wavlink HD4 Aerial Outdoor Extender is chiefly an outdoor networking device, users usually find it difficult to deploy and fix it. However, there is nothing difficult about the deployment process. If you are not sure how to deploy your Wavlink Aerial HD4 outdoor extender, follow the steps given below:
Wavlink Aerial HD4 Outdoor Extender Setup Via Web UI
The Wavlink Aerial HD4 outdoor extender setup process isn’t much different from other Wavlink models. However, since it is an outdoor networking product, you may find setting it up a bit tricky. But, there is no need to worry as we have outlined the setup steps below for you. Follow these steps to configure your Wavlink Aerial HD4 outdoor extender device:
Different Modes of Wavlink Aerial HD4 Outdoor WiFi Extender
Wavlink Aerial HD4 Outdoor WiFi range extender is a 3-in-one device. You can configure it as a router, extender, or access point, depending on your networking requirements. What’s more, the device can be configured in a WISP mode as well. Let’s understand what these modes are and when they are perfect for you.
Router Mode
Router mode is the most basic mode. When your Wavlink Aerial HD4 Outdoor WiFi extender is configured in router mode, it works absolutely the same as a router. It receives the signal from your modem and then broadcast it everywhere you want. You can activate this mode when you need the internet facility in only a limited area. And to activate this mode, you simply need to select the “router mode” during the setup process.
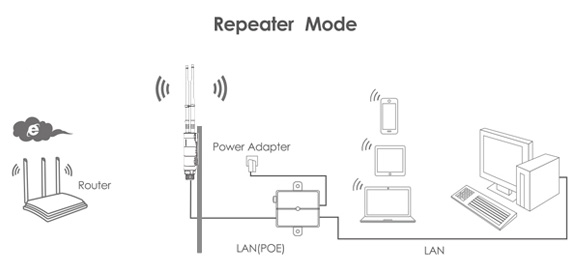
Repeater Mode
In repeater mode, your Wavlink outdoor extender device will work as a repeater. This means it will receive the signals from your modem or router and then rebroadcast it to a larger area. With this mode, you can get rid of the limited coverage issues and WiFi dead zones at your home or an outdoor place. To activate this mode, you will need to choose the “Repeater Setup” while performing the Wavlink Aerial HD4 Outdoor Extender setup.
AP/ Access Point Mode
When configured in an Access Point mode, the Wavlink Arial HD4 Outdoor device functions as a central hub for many devices connected to it. It enables wireless communication and data sharing between the devices by assigning a unique IP address to each connected device. It is beneficial, especially in two-story, three-story, or even four-story buildings. To activate this mode, first, you will need to place the device in a place where you need the network reach. After that, set up the device by selecting the “Access Point or AP Mode.”
WISP Mode
WISP mode is where your Wavlink outdoor extender device receives signals from other remote WiFi hotspots and then broadcasts them to the devices connected to it. If your primary modem or router isn’t providing sufficient internet signals, you can turn on this mode and make full use of this innovative feature. To enable this mode, you don’t need to do anything different. Simply, select the WISP mode when performing the Wavlink Arial HD4 outdoor setup.
Troubleshooting the Wavlink Arial HD4 Outdoor Extender Setup Error
It’s been seen that a number of users usually face different types of errors during the Wavlink Arial HD4 outdoor extender setup process. You may also experience the same. This is because of the technical complexity of the device. However, the positive thing is that you can resolve those errors readily by using a few simple troubleshooting steps. Find those out below:
Contact Our Technical Support Experts
Hopefully, the above-given information may prove helpful to you and you can complete the Wavlink Arial HD4 Outdoor extender setup. But, in case the above information doesn’t help much, you can connect to our technical support experts. They will guide you to do the setup in the most appropriate way with their expertise and experience.
Common Wavlink Extender Setups
Some Issues You Might Face
If you are facing any issues then please contact us, and we will be happy to help you.
