Wavlink Powerline Setup
The Wavlink powerline av500 setup is basically a WiFi extender kit that attaches to the existing router to improve its functionality. Whether it is your large house or multistory office, it helps to repeat the router signals in every corner. Even though you can avail of this service by installing this device at your place. However, you need to get a thorough knowledge of its configuration and further useful points to use it effectively. So, go through and utilize these points precisely.
Wavlink Powerline Setup Overview And Working
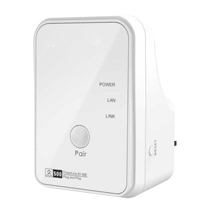
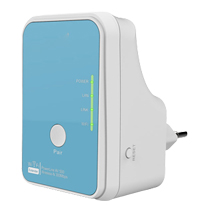
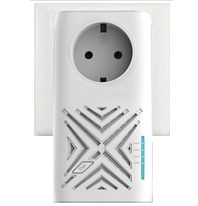
Talking about the Powerline setup overview, it has power plugs on the back panel. Whereas on the front panel, there is one Pair button along with a reset button. More than that, there are different LEDs for Power, LAN, Link, and WiFi indications. Lastly, it contains an ethernet wire port.
On the other hand, this compact device works on HomePlug AV and IEEE 802.3 technologies with WPA2-PSK encryption. The Pair button on its front panel makes the configuration process so easy. Moreover, the wired connections through cable ports allow the device to get stable internet signals.

Configuration Through Powerline Pair Button
As the Wavlink powerline setup has a Pair connection feature through which you can configure it shortly. To do this, follow the below-mentioned tips.
Thus, use your connected device and seamlessly enjoy the highest internet speed where you want.
Powerline AV500 Instructions For Setup
In addition to that approach, you can make use of any web browser on the network-connected device to configure it. In this method, access and visit the web-based setup portal to execute the process.
Hence, by using any method from these two ways, you will be able to install and use the Wavlink powerline setup appropriately.
Powerline Setup Different Models

WL NWP505G2 AV1200 Powerline Setup
WL NWP502M2 AV500 Powerline Setup
WL NWP502WM N300 Powerline Setup
WL NWP502W2 AV500 Powerline Setup
WL NWP505D2 AV500 Powerline Setup
WL NWP101G2 AV1200 Powerline Setup
Troubleshoot The Powerline Errors
Evidently, the Wavlink powerline setup is a pair-to-use device, in case there is any error in the powerline av500 pairing, use these resolving tips.
After trying those above-mentioned steps, if the Wavlink powerline setup still keeps malfunctioning. Then, choose the reset function to eliminate the error.
Wavlink Powerline Features
This wavlink compact and portable device enables users to get a range of benefits under one platform. Interestingly, it offers up to 500Mbps to the devices through wired connections. What stands out is it can cross thick walls to deliver the highest internet speed. Fortunately, there is no requirement to use any extra wire to configure this device as it comes with a pair-and-use function.
Therefore, you will surely be successful to configure and eliminate the errors of the Wavlink powerline setup. In any case, if you get any hurdles in the process, contact us freely to get assistance. To reach us, you can call us at 716-992-6371 or mail us at [email protected]. We will assist you shortly!
Common Wavlink Extender Setups
Some Issues You Might Face
If you are facing any issues then please contact us, and we will be happy to help you.
Wavlink Powerline FAQs
Yes, the wavlink powerline provides strong internet signals bypassing the walls. The wired connection of this setup helps the connected devices to get an uninterrupted signal.
Absolutely yes, the Pair button on this device allows users to configure it without the help of any extra wire. You will only require the ethernet wires to attach both powerlines to the router and your device.
To pair up your wavlink powerline, plug them into the power sockets, and turn the switches on. Once these become ready to pair, press the first powerline’s pair button and after a few seconds, push the button of the second one. Finally, the LEDs will indicate that the pairing is successful.
Basically, the powerline setup creates a network through a wired connection between the host router and the devices. It joins these gadgets to offer stable and secure internet signals.
