Wavlink AX1800 Setup
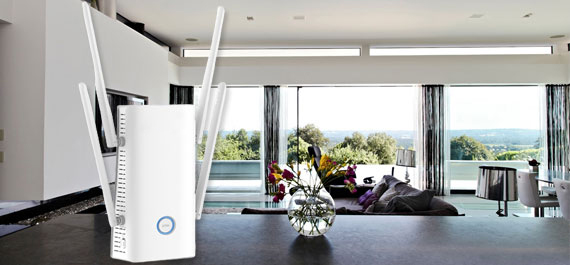
Wavlink AX1800 Product Features And Overview
This Wavlink AX1800 device works by supporting the new WiFi standard 802.11AX and 2.4 GHz and 5 GHz bands simultaneously. These bands provide the highest internet speed up to 1800 Mbps. Moreover, the built-in MU-MIMO technology allows users to connect multiple devices to it.
While talking about its overview, it has two Gigabit Ethernet ports for wired connections. Additionally, there is a built-in smart indicator that detects and represents the signal’s strength. Lastly, there is a WPS button for the Wavlink AX1800 setup and a reset button to factory reset the extender.
Wavlink AX1800 Manual Method Setup
This Wavlink AX1800 manual setup process does not require any web or IP address and login credentials, which is why it is a comfy method. To do this, use the Wavlink AX1800 extender and your router’s WPS buttons.
Thus, connect your other devices to the Wavlink AX1800 network and enjoy seamless internet speed.
Wavlink AX1800 WiFi Extender Setup On Web-Based Portal
In case your existing router doesn’t have a WPS button, or you want to do the Wavlink AX1800 extender setup in another way. Then, access the extender’s web-based setup page to do this.
Tip: If you are using a PC or laptop, then prefer to make a wired connection instead of a wireless one. As a result, there will be a strong internet signal and connection.
Wavlink AX1800 Extender Setup On The App
Besides those setup processes, you can use the Wavlink WiFi app to do the Wavlink AX1800 setup. For this process, install the Wavlink app on your device by using its app store.
Troubleshoot The Wavlink AX1800 Setup Errors
After doing the Wavlink AX1800 Setup, you may get some errors in its operation. To eliminate them, utilize these tips according to the type of error.
Reboot The Extender
In another troubleshooting tip, try to power cycle the extender, as there can be a temporary technical error. Take out the extender from its power outlet and the existing router too. After waiting for some time, plug in the extender again, but use a different power outlet this time. Also, try to choose another location for the extender, which must be far away from metallic and electrical appliances. In the end, connect your device to it and check working as well.
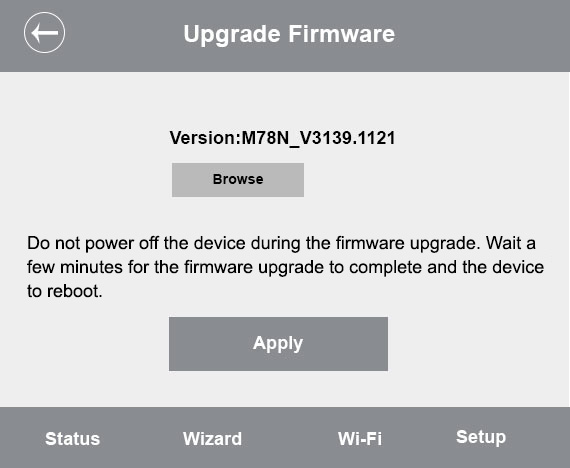
Update AX1800 Firmware
To get the AX1800 performance better after doing the Wavlink AX1800 setup, update its firmware. Check the latest firmware file on the Wavlink AX1800 setup portal using your networked PC. Download the file if there is any new available. Then, carry out the firmware updating process from the same page and check the performance. Doing so will surely help you to get the optimized working of the extender.
Reset The Wavlink AX1800 Extender
After following those tips, reset the extender if it is malfunctioning continuously. To do this, disconnect your devices from it and locate the reset button on the extender. Next, press that button until the LED starts blinking. Now, let the device perform its factory reset process. After resetting the device, do the Wavlink AX1800 setup again.
We hope that through using these installation and troubleshooting tips, you will be able to use your Wavlink AX1800 setup properly. In case you have any queries about the procedure, then reach out to our team to get the solutions.
Common Wavlink Extender Setups
Some Issues You Might Face
If you are facing any issues, please contact us, and we will be happy to help you.
FAQs
The default web address of Wavlink is wifi.wavlink.com, and the IP address is 192.168.10.1. The login information is admin for the username and password.
While configuring it, you must place and fix it near the existing router. But, after the configuration process, you can relocate it halfway between the router and the connected device. If you are using this device at your house, then the ideal location for this device is at the center of the house.
For a wireless connection, select the extender’s network from the WiFi network list on your device. Fill in the network’s password and click Enter. In the case of a wired connection, use an Ethernet wire and insert the wire ends into the extender and your device’s Ethernet ports.
You can visit the web-based setup page to make changes. Access the login page on your device’s web browser and log in there. Afterward, go to the advanced settings and make the modifications that you want. In the end, click the Save option to apply those changes.
