Aerial HD6 WiFi6 Setup
For your larger house or multi-story building, the Wavlink Aerial HD6 WiFi6 setup can be a dependable device. With its multiple setup modes and advanced technology features, it can offer optimized internet performance with ease. As you can configure and use this device in four different robust modes, such as a router, repeater, AP, and LAN bridge mode. Which allows you to cover every other corner with WiFi signals accordingly at your place. To get to know more about this device and the Aerial HD6 WiFi6 setup approaches, continue to read this page’s information.
Aerial HD6 Product Features And Unboxing
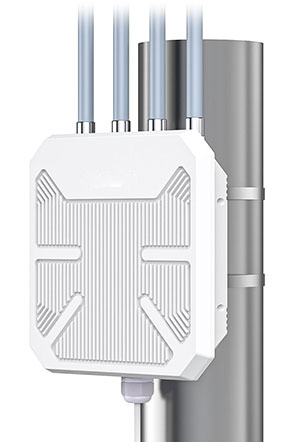
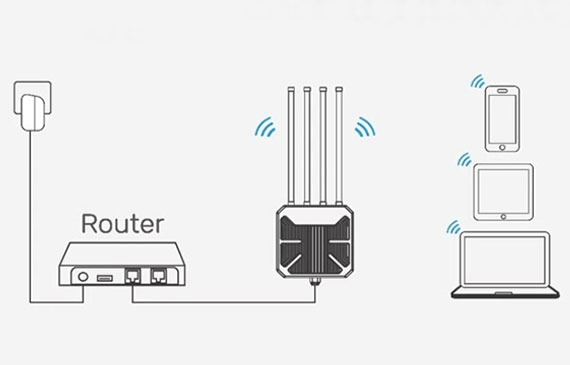
The Wavlink Aerial HD6 is designed with WiFi6 technology that operates with the highest internet speed by reducing network congestion. Talking about technical terms, it has 160MHz bandwidth along with the 1024-QAM for faster and strong internet connections The MU-MIMO and OFDMA features enable several devices connectivity simultaneously possible with stable signals. Whereas, for setup purposes, it supports a PoE converter for easy installation with an existing router.
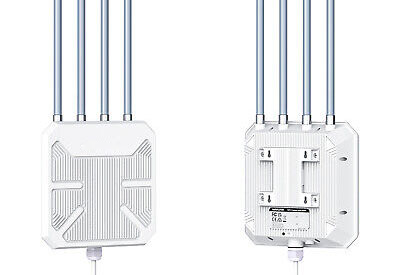
While you unbox the aerial HD6, you will get the device itself along with its 4 detachable antennas, body holder, cable ties, and setup guide. After getting these, the first step here is to attach the device’s parts together for the Aerial HD6 WiFi6 setup process. However, it is advisable to go through the setup guide once for brief information about the setup process. Later, take the PoE converter, power adapter, and ethernet cable to make the mesh device ready to connect.
WPS Method For Aerial HD6 WiFi6 Setup
To install the Aerial HD6 with your existing router with little effort and less time, choose its WPS/Pair button. Ensure your router is compatible to set up on the WPS feature, if it is, then start the Aerial HD6 WiFi6 setup procedure.
Aerial HD6 WiFi6 Setup On The Web UI
To configure the Aerial HD6 differently and to choose another working mode, you will require to access its web setup portal. To visit there, use your networked device and open its web browser and follow the remaining steps below.
Select The Operating Mode Accordingly
As mentioned above, you can choose the mesh extender’s working mode as the router, AP, or LAN bridge. Every other mode will work and create a network differently. Doing so will enable you to fulfill your internet requirement as you desire and require, with maximized performance.
Setup And Management On The App
Apart from the Pair button and the web UI setup, you can use the Wav Router app to do the Aerial HD6 WiFi6 setup. Also, that app will allow you to manage the network after setting up the mesh extender. In this process, get the app on your networked device through its app store and use the app screen directions to carry out the setup process. Afterward, manage the network’s wireless advanced settings and do changes as you desire for better internet signal and speed. But, don’t skip to click on the Save button to get those changes in action.
Update The Aerial HD6 Firmware
Equally important to those advanced changes, it is necessary to update the firmware version on time to get maximized performance. Check the latest version available on the Aerial HD6 WiFi6 setup window for your Aerial HD6. It is reckoned to use the PC for this process and save the new file on it. Thereafter, click on the Firmware Update option and upload the file there. Wait till the browser complete the process and don’t turn off the PC and mesh setup during the process. As a result, there will be a greater improvement in the setup working for sure.
Troubleshoot The Errors
In any case, if you start getting errors in the Aerial working, try to recognize the source of the error. So that, you can implement the appropriate solution to the network. Here are some common causes that can lead you to face the errors, check them out once.
Try to verify the above-mentioned causes in the entire network and resolve them accordingly. If the error still persists, then choose the mesh extender’s reset function.
Reset The Aerial HD6
To reset the mesh extender, remove the networked devices from the Aerial setup first. Now, press the reset button from its panel and hold that button for a few seconds. Wait till the Aerial HD6 finishes the reset process, and after some time the LED sign will tell you about the process. Later, do the Aerial HD6 WiFi6 setup again as resetting this will discard the older configured settings and the errors as well. Choose any method from those setup processes, and enjoy the network.
From now, you will be able to use the Aerial network optimally, if you can’t, then get in touch with our Wavlink experts. They will let you set up the mesh extender by providing relevant setup guidance in less time. Contact them either through the calling option or by mailing your queries to them.
Common Wavlink Extender Setups
Some Issues You Might Face
If you are facing any issues then please contact us, and we will be happy to help you.
FAQs
You can choose the web UI method and the Wav Router App to do the Aerial HD6 WiFi6 setup. Access the web setup portal by searching the Aerial’s web or IP address in any web browser. Or install the Wav Router app from your device’s app store. Choose any option and follow the on-screen directions to do the setup.
You can select the operating mode of the Aerial device while doing the Aerial HD6 WiFi6 setup. Apart from that, you can visit the web management page and change the working mode of the mesh extender after setting it up.
