Finding it troublesome to navigate the Wavlink router login process? If yes, no issues, as this blog post will provide you with a helping hand for the same. Logging into the router’s main page is crucial not just for the initial setup of the router but also for the management of other settings and the overall network as well. Most importantly, if you are facing any connectivity problems, then it could be because of the pending updates. Therefore, for the installation of a new firmware version, again, login becomes mandatory. The login process is simple. So it won’t take up more than five to ten minutes. Let’s now start with the process.
Requirements For Wavlink Router Login
For login, the requirements are very minimal. You need:
- A smart device.
- Access to a web browser.
- Thereafter, the accurate login address for the Wavlink router.
- Next up, the right login details.
- Lastly, an Ethernet cable. Although it is optional, we recommend using it for stable connectivity.
In case you do not remember the accurate credentials for the Wavlink router login, then you first need to reset the router. For this, follow these simple steps:
- Power on the router.
- Let it activate properly.
- Meanwhile, look for a sturdy toothpick or a straight pin.
- Now, pick the chosen object into the reset point of the router. Push downwards.
- Wait for the LED indicators to blink.
- Finally, on release, the router returns to its default settings.
Wavlink Router Login Guidance
For easy understanding, we have provided a breakdown of the whole process in the form of points. So you just have to follow them one after the other.
- First, make sure the Wavlink router has a proper connection to the power source and is active.
- On your router’s base or on the back side, you’ll find a label. On this label, the SSID and a passkey are written. Note them down.
- Now fetch a smart device. You can use your mobile phone as well. Further, turn on its wifi. From the list, choose the router’s identity that you just saw on the router itself. Input the passkey. Tap on Connect.
- Whereas if you want to avoid the above-written wireless method for the Wavlink router login, then you can build the connection directly with the help of an Ethernet cable.
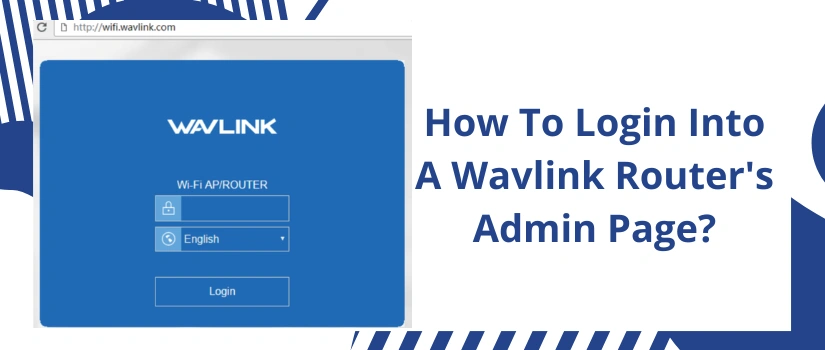
- Thereafter, on the same device, launch Internet Explorer. Other compatible options are Chrome, Firefox, Safari, and Edge.
- Now head to the browser’s URL bar. With complete precision type http://192.168.10.1. Click Enter.
- With this, you now need to fill in your login details. If it’s your first time with the Wavlink router login, then use:
- Username: admin
- Password: admin.
- Finally, tap on Login, and you now have access to the admin page.
Note:
Just after the login process completes, first, you should alter the default login details. Next, look for the pending updates. Thereafter, enable security encryption for network protection. You can also isolate your main Wavlink router network by creating a guest network for the visitors.