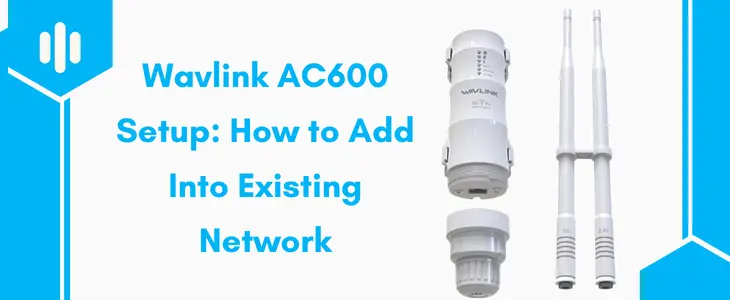
Wavlink AC600 Setup: How to Add Into Existing Network
When it comes to enhancing the signal range of an existing wireless network, a trusted and highly efficient networking device that comes to mind is the Wavlink AC600. This compact yet powerful range extender significantly boosts your current network by amplifying the wireless signals, thereby reducing or eliminating dead zones in your home or office. Whether you’re struggling with poor connectivity in corners of your building or outdoors, the Wavlink AC600 setup can help create a stable and wide reaching network.
The Wavlink AC600 is designed for flexibility and can be configured in multiple modes. You can configure it in Access Point, Repeater, and Router mode. You can carry out the wavlink ac600 setup process easily using the official setup portal wifi.wavlink.com. To ensure a successful and seamless installation, this blog will walk you through the entire procedure step by step. Also further you will find solutions to common issues.
Wavlink AC600 Setup: Requirements
First gather the necessary items for the wavlink ac600 configuration. Verify that you have all the below listed items or not:
Wavlink AC600 Setup Instructions
Let’s take a closer look at the process involved in setting up the Wavlink AC600 in all its supported modes.
Unboxing the Device
Unboxing the AC600 device is the first step. Inside the Wavlink AC600 packaging, you’ll find:
The wavlink ac600 manual is essential for identifying hardware components and understanding LED indicators.
Choose a Strategic Location
The performance of your extender depends on where you place it. You should find a strategic location to place the device. Tips to place the device are as under:
Powering On the Device
To turn on your Wavlink AC600, take help of the power adapter or PoE converter.
Once the LED shows solid green, the device is ready for the next step.
Connect to the Default Wavlink Network
The fourth step of the wavlink AC600 configuration is to connect to the default wavlink network. You can use a computer/ laptop/ smartphone.
This step connects you to the AC600’s admin interface but doesn’t provide internet access yet.
Access the Configuration Page
You can access the setup page by follow the below given steps:
If you cannot access the portal, check the wavlink ac600 manual pdf or check your network connection.
Choose a Setup Mode
Once logged in, choose your setup mode to configure the device:
After selecting the mode, the wavlink ac600 configuration wizard will begin. Follow the prompts.
Complete the Configuration
Depending on the mode selected you have to proceed with the setup steps:
Click “Apply” when all the changes are done. The system will reboot and apply the new settings.
Update the Firmware
Outdated firmware may cause performance issues. Always check for updates after setup:
Keeping your wavlink ac600 firmware up to date ensures optimal performance and security.
Test Your Connection
Disconnect your laptop or phone from the previous network and connect to your new Wavlink AC600 network.
Common Wavlink AC600 Troubleshooting Tips
Even with a smooth wavlink ac600 setup, occasional issues can arise. Here’s how to resolve the most common ones:
Unable to Access wifi.wavlink.com or 192.168.10.1
One of the most frequent issues during the wavlink ac600 setup process is not being able to access the login page using wifi.wavlink.com or 192.168.10.1. This can occur due to incorrect network connection or a mistyped IP address. Verify that the device is connected to the default Wavlink network. Also clear your browser’s cache files. You can use incognito mode too. If that doesn’t work, disconnect other networks and reboot the extender. These steps are explained clearly in the wavlink ac600 manual pdf.
No Internet Access After Setup
After completing the wavlink ac600 configuration, some users face no internet access even though the connection appears established. This typically results from entering the wrong WiFi credentials or poor device placement. Re-run the wavlink ac600 setup wizard and enter your main WiFi password correctly. Ensure your extender is not too far from the router. Placement guidance is provided in the wavlink ac600 manual for optimal coverage.
Power LED Not Turning On
If the Wavlink AC600’s power LED doesn’t light up or continuously blinks, it may indicate a power issue. Check that the adapter is securely plugged in and try a different outlet. If the issue continues, use the reset button for 10 seconds to perform a soft reboot. Go to the wavlink ac600 manual pdf for identifying LED indicators and power troubleshooting.
Forgot Admin Username or Password
Losing access to the admin panel can prevent configuration changes and wavlink ac600 firmware updates. Hold the reset button for 10 seconds to reset the extender. After rebooting, you can use the default admin credentials to log in and restart the wavlink ac600 configuration.
WiFi Signal Is Weak or Keeps Dropping
Weak signals or frequent disconnections are often caused by outdated wavlink ac600 firmware, overlapping channels, or incorrect mode selection. Update the wavlink ac600 firmware by logging into the web interface. Navigate to System Tools and then choose Firmware Upgrade. Change the WiFi channel to a less crowded one and verify that you’re using the correct mode, as per your network setup. Details on each mode are provided in the wavlink ac600 manual.
Wavlink AC600 Is Not Broadcasting WiFi
Sometimes, after setup, the device appears to be working but doesn’t show any WiFi network in the available list. Make sure the device isn’t in Bridge Mode. If it is, switch to Repeater or AP mode. A factory reset followed by a fresh wavlink ac600 setup usually resolves this. Consult the wavlink ac600 manual pdf for LED meanings and mode settings.
Firmware Update Freezes or Fails
Keeping the wavlink ac600 firmware updated is important, but users may encounter failed updates or frozen screens during installation. Wait 10 minutes before restarting the device if the update freezes. If needed, download the latest firmware from Wavlink’s official website and upload it manually via the admin interface. Step by step guidance is available in the wavlink ac600 manual.
Ethernet Port Not Working
If you’re using the AC600 in AP or router mode and the Ethernet connection fails, there could be an issue with the cable or port. Use a known working RJ45 cable. Check the PoE converter is correctly installed. If needed, recheck cable placement and setup using diagrams from the wavlink ac600 manual pdf.
Conclusion
The Wavlink ac600 setup process is hassle free. Whether you’re extending your current network, creating a new one, or using it as a router, the device offers a versatile solution to your wireless connectivity needs. Using this guide, you’ll easily navigate the wavlink ac600 configuration, understand how to update the wavlink ac600 firmware, and consult the wavlink ac600 manual as needed. In case you run into any problems, the troubleshooting section helps you get back online quickly. With Wavlink AC600 enjoy seamless browsing, buffer free streaming, and strong WiFi, wherever you are.
You can take help from our technical experts in case you are facing any issue with the setup or troubleshooting. Our tech team is just a call away from you.

