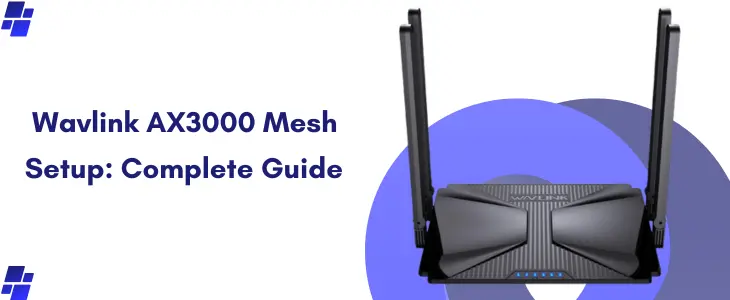
Wavlink AX3000 Mesh Setup: Complete Guide
Wavlink AX3000 mesh networking device is used to create a mesh network for high speed internet and stable connection. Setting up a wavlink AX3000 mesh router is not a hard to follow task for those who know what to do and how. This device is designed to eliminate WiFi dead zones, provide seamless roaming, and ensure a strong internet signal across your entire home. Whether you’re setting it up for the first time or reconfiguring it after a reset, this guide will walk you through every step. With options for both web based and app based setup, getting started with your Wavlink AX3000 mesh system is simple and convenient.
The Wavlink AX3000 mesh setup can be performed through two convenient methods: web based setup and app based setup. Both methods are easy to follow and can be completed in a few minutes.
Before You Initiate
Before diving into the configuration steps, ensure you have all the essentials ready:
Unbox and Power Up Your Device
Start by unboxing your Wavlink AX3000 mesh router. Inside the box, you’ll find the mesh unit, power adapter, Ethernet cable, and Wavlink AX3000 manual. Place the mesh unit near your modem. Plug the power adapter into an outlet and connect the mesh router to the modem using the Ethernet cable. Allow the LED indicator to turn solid, signaling that the device is fully powered on and ready for the setup process.
Web Based Setup Method
The web based Wavlink AX3000 mesh setup is simple and doesn’t require installing any app. This method is preferred by users who want more manual control over configuration.
Connect Your PC or Laptop
Use WiFi or a LAN cable to connect your computer to the Wavlink AX3000 network. You can find the default SSID and password on the label attached to the device or inside the Wavlink AX3000 manual.
Access the Login Page
Open a web browser and type the Wavlink AX3000 login IP address 192.168.10.1 or http://wifi.wavlink.com in the address bar. Press enter to reach the login screen.
Enter Login Credentials
Use the default username and password mentioned in the Wavlink AX3000 manual. Typically, both fields are set to admin.
Follow the Setup Wizard
After logging in, follow the setup wizard’s prompts. Select your internet connection type and fill in the details supplied by your ISP.
Create a New WiFi Network
Set a custom SSID and secure password for your mesh network. This will be the WiFi name your devices recognize and connect to.
Complete Setup and Reboot
Save the settings. The device will reboot and apply the changes. Once the reboot is complete, your Wavlink AX3000 mesh network will be up and running.
App Based Setup Method
For users who prefer configuring the device using their smartphone, the Wavlink AX3000 mesh setup can be done using the WavRouter app.
Download the App
Go to the App Store (iOS) or Google Play Store (Android) and download the “WavRouter” app.
Connect to the Device
Make sure your smartphone is connected to the default WiFi network of the Wavlink AX3000. The SSID and password are available on the device or in the Wavlink AX3000 manual.
Launch the App
Open the app and follow the on screen instructions. The app will automatically detect your Wavlink AX3000 mesh router.
Login and Setup
You’ll be prompted to log in. Use the default credentials (admin/admin) unless they were changed previously.
Network Configuration
Select your internet connection type and enter necessary ISP details. Then, configure your mesh network by setting a new SSID and WiFi password.
Finalize Setup
Save all settings. The device may reboot, and your new mesh network will be active and ready to use.
Mesh Network Optimization
After completing the Wavlink AX3000 mesh setup using either method, it’s important to optimize your mesh network.
Troubleshooting Tips
If you run into issues during your Wavlink AX3000 mesh setup, try the following tips:
Check Cable Connections and Power Supply
Ensure all cables are connected properly and power is stable. A loose Ethernet cable or an unstable power supply can result in setup failure or inconsistent network performance. Double check that the Ethernet cable between your modem and the Wavlink AX3000 mesh router is securely plugged in and that the power adapter is fully inserted into both the outlet and the device.
Verify SSID and Password Accuracy
Double check the SSID and password you’re entering. When trying to connect a smartphone, tablet, or computer, ensure you’re selecting the correct WiFi network name (SSID) and entering the right password. Typing errors in credentials is one of the most common issues preventing successful connection.
Reset If Locked Out
Reset the device if you’re locked out. Sometimes login credentials are changed during initial setup and forgotten later. In such cases, press and hold the reset button for about 10 seconds. This will restore the Wavlink AX3000 to its factory default settings, allowing you to start the Wavlink AX3000 mesh setup process anew with the original login information mentioned in the Wavlink AX3000 manual.
Restart Devices to Refresh Connection
Restart your modem and mesh device to refresh the connection. Temporary glitches in connectivity can easily be resolved with a simple reboot.
This helps reset the network parameters and often clears temporary connectivity errors.
Consult the Wavlink AX3000 Manual
Consult the Wavlink AX3000 manual for step by step guidance on troubleshooting particular problems. The manual provides solutions to error messages, LED status meanings, and steps to resolve uncommon setup problems. It is a handy guide that should always be kept nearby during installation and configuration.
Use Alternative Browsers or Clear Cache
If the login page doesn’t open, try a different browser or clear cache. Sometimes, browser issues can block access to the Wavlink AX3000 login page. Try using a different browser or clear your current browser’s cache and cookies. Check if you are entering the correct IP address 192.168.10.1 or URL http://wifi.wavlink.com.
Wavlink AX3000 Login Access
To access the Wavlink AX3000 login panel anytime after setup, connect your device to the network and enter the login IP in your browser. This will allow you to manage network settings, add more mesh nodes, and monitor connected devices. Regular login access ensures your network stays optimized. With the Wavlink AX3000 login credentials, you can:
Wavlink AX3000 Manual Guidance
The Wavlink AX3000 manual is a valuable resource during setup. It contains:
Always refer to the Wavlink AX3000 manual for accurate and brand specific setup instructions. It ensures a smooth and error free configuration process.
Benefits of Using Wavlink AX3000 Mesh Router
Final Words
Setting up your Wavlink AX3000 mesh router doesn’t have to be overwhelming. Whether you use the web based method or app based approach, the process is designed to be user friendly and efficient. With the help of this complete guide, along with the Wavlink AX3000 manual, you can complete the Wavlink AX3000 mesh setup without any confusion. Don’t forget to perform the Wavlink AX3000 login post setup to make necessary adjustments and improve your home network performance.
Now that your network is ready, enjoy seamless internet connectivity across your entire space. For further help, contact Wavlink support or refer to the troubleshooting section in the manual. With the right setup and configuration, your Wavlink AX3000 mesh system can provide reliable, high speed internet throughout your home or office.

