
Guide to wifi.wavlink.com: Setup, Admin Access and Login
Struggling with weak home network signals is a thing of the past. You can easily boost your home network performance with the Wavlink extender setup. An extender is a device designed to amplify and extend your WiFi signals, ensuring better coverage throughout your space. Wavlink offers a variety of range extender models, each packed with different features and specifications to suit your needs.
To set up any Wavlink extender model, you simply need to access the web interface at wifi.wavlink.com login. This user-friendly interface guides you through the setup process quickly and efficiently. In this article, we’ll walk you through the detailed steps to complete your Wavlink WiFi extender setup and optimize your home network coverage. Follow our easy, step-by-step instructions to get your extender up and running in no time!
wifi.wavlink.com Setup Process Step by Step
wifi.wavlink.com Setup Process includes following steps which you can follow to add the device into your existing network.
Wavlink Extender Installation Guide
Access Wifi.wavlink.com Login
Configure Your Extender Device
Relocate and Test Your Extender
Log In to Your Wavlink Extender
Accessing your Wavlink range extender is simple and can be done through the wifi.wavlink.com login portal. Follow these easy steps to get started:
Connect to the Extender Network
Use a laptop, desktop, or mobile device and connect it to the Wavlink extender’s SSID (WiFi network name). This SSID is typically listed on a label at the back or bottom of the device.
Enter the WiFi Password
When prompted, enter the WiFi password. This is usually the default security key, also printed on the back of your extender.
Open a Web Browser
Launch any modern web browser such as Google Chrome, Safari, Firefox, or Microsoft Edge.
Access the Setup Portal
Specify wifi.wavlink.com or 192.168.10.1 in the URL. Hit on enter to open the interface.
Log in to the Admin Dashboard
On the login screen that appears, enter the default username and password. Default credentials are admin for both fields.
Enter the Admin Panel
Click the Login button to access the wifi.wavlink.com admin dashboard, where you can begin your wifi.wavlink.com setup, change settings, or manage your extender.
Change Network Password
For improved security, it’s advisable to change the default network password of your extender:
Connect to the Extender Network
Link mobile/ computer/ laptop to your Wavlink extender’s SSID. The default SSID is usually printed on a label on the back or bottom of the device.
Access the Web Portal
Open any updated web browser (Google Chrome, Firefox, Safari, or Microsoft Edge). Specify wifi.wavlink.com or 192.168.10.1 in the URL. Hit on enter to open the interface.
Login to the Admin Dashboard
On the wifi.wavlink.com login page, enter your username and password. If this is your first time logging in, use the default credentials—typically admin for both username and password.
Navigate to Wireless Settings
Once logged into the wifi.wavlink.com admin dashboard, locate the Settings tab. From the dropdown or sidebar menu, select Basic Settings, and then click on the Wireless option.
Edit Wireless Network Name (SSID)
Inside the Wireless section, you’ll see your current network name (SSID). You can keep it or rename it to something unique and identifiable, especially if you’re using multiple extenders.
Update Wireless Password
Below the SSID field, locate the Password or Pre-Shared Key field. Delete the existing one (if any) and enter a new strong password that combines letters, numbers, and symbols. This ensures your network remains secure against unauthorized access.
Save the New Settings
After entering the new SSID and password, scroll down and click the Save or Apply button. The extender may take a few seconds to save the configuration and reboot.
Reconnect Devices
Once the changes are applied, your extender will broadcast the new SSID with the updated password. You’ll need to reconnect all your devices using the new credentials.
Verify Network Performance
To confirm the update was successful, connect a device to the new SSID using the new password. Check internet connectivity and signal strength in different areas of your home.
Change Admin Account Password via wifi.wavlink.com Admin Panel
For improved security, it’s advisable to change the default login credentials of your extender:
Access the Admin Dashboard
Begin by connecting your device (laptop, PC, or mobile) to the Wavlink extender’s network. Specify wifi.wavlink.com or 192.168.10.1 in the URL. Hit on enter to open the interface. Enter your current admin username and password to log in to the wifi.wavlink.com admin dashboard.
Navigate to the Admin Settings
Once you’re logged into the dashboard, locate the Settings menu. From the dropdown options, select Administration, then click on Management. This section allows you to modify administrative access controls.
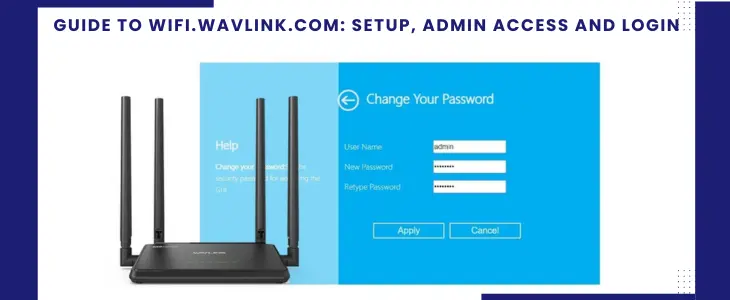
Enter a New Admin Password
In the Management section, you’ll find fields to update your admin credentials. Carefully type your new desired password into the “New Password” field. Again enter the same in the “Confirm Password” field.
Save the Changes
Choose the save button to execute changes. Your admin account is now secured with the updated password.
Re-login if Prompted
In some cases, the extender may prompt you to log in again using the new password. Enter the updated credentials to continue accessing the dashboard.
Store the New Password Safely
Make sure to note down or store your new admin password in a secure place. This will help you avoid being locked out of the settings panel in the future.
Update Firmware via wifi.wavlink.com Setup Interface
To ensure your Wavlink extender runs efficiently, keep its firmware updated:
Reset Your Extender to Factory Settings via wifi.wavlink.com
If you encounter issues or want a fresh start, you can perform a factory reset:
You can now redo the wifi.wavlink.com setup process to reconnect the extender to your home network.
Conclusion
The wifi.wavlink.com portal serves as the central hub for setting up, managing, and customizing your Wavlink extender. Whether you’re performing the initial wifi.wavlink.com setup, changing network settings, or accessing the wifi.wavlink.com admin dashboard, this guide walks you through each step with clarity and ease. From logging in to updating passwords and configuring your wireless settings, managing your extender has never been more straightforward. By following the outlined steps, you can enhance your network coverage, improve security, and ensure a stable internet connection throughout your home. Keep this guide handy for hassle-free Wavlink extender management anytime.
