Wavlink BE5100 Outdoor Router Setup
Looking for a device to enhance your wireless network outside your home? If so, then you can check out the Wavlink BE5100 Outdoor Router. With the setup of this device, you will get blazing-fast speed, robust range, and unmatchable reliability. You can configure this device in both environments, whether at your home or in a commercial environment. Performing the Wavlink BE5100 setup process is an easy task, whether to install it for your backyard, for coverage of a remote office, or for an outdoor surveillance system. Get started with your Wavlink BE5100 router setup using this simple guide.
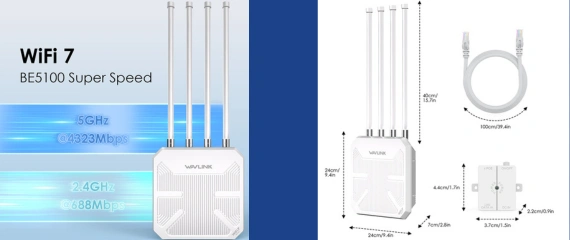
Wavlink BE5100 Features
Wavlink WiFi7 BE5100 Outdoor Router is a powerful device equipped with the latest technology of Wi-Fi 7. Here are the key features of the device that you should know before moving towards the setup process:
Wavlink BE5100 Pre-Installation
Before performing the Wavlink BE5100 outdoor router setup, ensure you have the following:

Wavlink BE5100 Setup Process
The process is very simple, as you think, it involves only 6 steps specified here:
Unboxing And Inspect Router
Begin the setup by unboxing the router. Ensure the package includes:
Choose The Right Mounting Location
The proper location to keep the device is very crucial for the device’s performance. You cannot place the device anywhere and expect it to work better. So while performing the setup, you have to choose the right location to mount the device. While choosing the location to mount the device, you have to focus on the following
Once you’ve chosen the mounting location, use the provided mounting kit to securely attach the router to the pole or wall where you intend to install it. Tighten the device properly so it can withstand weather conditions like wind or rain.
If installing near a moisture-prone area, then you have to ensure all cable connections are sealed with the waterproof cover or tape to prevent water damage while raining. Now you can proceed to the next step of the wavlink wifi7 be5100 outdoor router setup
Connect Power And Network
Now you have to form a link with the power & the network. Using the power adaptor, you have to link the router device. Plug the adapter into a waterproof outlet, and along with the router. After connecting the device to the power, you have to connect the Ethernet cable. From the router to the PoE injector’s LAN+Power port, then connect the injector to the power supply and your main router/modem.
Perform The Configuration Using Web
Step ahead in the wavlink wifi7 be5100 outdoor router setup process to access the web. Here are the steps:
Perform The Configuration Using Web
Step ahead in the wavlink wifi7 be5100 outdoor router setup process to access the web. Here are the steps:
Final Configuration
Now you have to create a network name along with a password for your wavlink wifi7 be5100 outdoor router setup. Replace both the frequencies’ default details, and then choose WPA3 or WPA2 security. Apply the changes you have made to the Wavlink Be5100 setup and reboot the router device.
Wavlink Be5100 Outdoor Router Setup: Common Issues
While performing the Wavlink WiFi7 BE5100 Outdoor Router Setup, you might face common issues reported by many users. These issues are:
In case you encounter any of them while doing the Wavlink Be5100 router setup, then you have to apply troubleshooting to get rid of them. Troubleshootings are specified in the next segment.
Wavlink Be5100 Setup: Troubleshooting Common Issues
To resolve all the above mentioned errors you face while performing the Wavlink WiFi7 BE5100 Outdoor Router Setup, you have togo with these steps:
If the issue persists, then quickly call our executive for help on the given number or drop a text in the live chat section, and we will connect you. Hurry! Call!
FAQs
Connect your device to the default SSID (e.g., Wavlink-XXXX). Open a web browser and enter wifi.wavlink.com or 192.168.10.1. Use the default password “admin” to log in.
You can configure the BE5100 in Mesh Router, AP, Repeater, Mesh Extender, or WISP mode depending on your network requirements.
